And welcome back to another "How To".
Last weekend I have attended to the Starlord's Mixtape Vol.1-Tournament,
and since I am somewhat part of this group, ofcasue I bought some of my tables with me. Going into revision with your old terrain can be fun... or a challeng to bring them up to date.
This article shall shine some light on me repainting my MicroArtStudio Buildings, which have been in my Infninty Collection since the very first day.
As you might know from a previous "How to", I was very keen on that Salt-Weathering technique, especially on my buildings. As I have grown (old), my taste has changed a bit and now I would like my buildings a little less run down. I still want them to look weathered, but not in that "Brwon speckles everywhere" I had done previously.
Another goal was to get them all done in one go, since I wanted them to look more unified and appear more homogeniously on the battlefield.
So, let's dive into it.
Materials
- Spraycans- Masking Tape
- Buildings
Technique
I have tried to illustrate the technique I use in a grafic. Basically it works like zenithal priming.
Each layer of paint is sprayed on from a steeper angle.
This way, you will always see a little of the previous paint layer and get a sort of blending.
Since you build the color layers with the purpose of a sort of blending, you don't need to wait until the paint is dry. Just remember to place the buildings on a piece of wood, so you can turn them, without touching them. That speeds up the process immensly.
So, let me walk you through.
Step 1
I have painted the interior of the buildings first. After the paint has dried, I Close the doors and windows with masking tape shut.After that, the whole building gets a covering layer of brown.
Step 2
Since I want to have a bit of a contrast to the warm brown, the first layer of actual paint will be a bright color that will shine through. depending on your table, this can be sort of a basic color, that is repeated again.I chose, for maximum contrast to the warm brown, a cold blue.
As you can see, I made sure, not to cover every corner, so that a little brown is still visible in the corners (where dirt and grime naturally would gather.)
Step 3
The next layer is the actual color that I want the building to have. Since the ground floor of my board is already rather colorfull, I decided that the buildings should be less colorfull and went for a medium grey.On first glance, the building is now grey, but if you look closer, you still can see the previous layers.
Step 4
Finally the light grey from a very steep angle for the final highlights.If you are aiming for a rather clen look of your buildings with some slight shading, you are good now. You still could go and pick out more highlights with a brush, but I felt, the building could use some more dirt.
Step 5
So I picked up my light ockre and went for it. I wanted to create a better transition between the building and the ground I will be standing on. Therefore I wanted the buildings to be brownish at the very bottom. You could use a airbrush to achieve this sort of weathering, but mine has been out of order for way to long, so I needed to find another way to get the dirt on quickly.
So, I came up with the following technique.
1. Take the can...
2. ...and spraay right next to the building in short, light bursts.
This way, very little paint gets dusted on the building, which creates a faint brownish layer, with the basic color still shining through.
Step 6
Now the base of the buildings are dirty. But dirt tends to get everywhere... so I picked out areas that would see los of use, like the places where later the ladders will be glued onto. These areas got another faint and very carefull burst of ockre.Since the brown looks now... pretty sprayed on, I wanted to take a way sme of the bluntness...
...picked up the grey again and gave the ockre areas another coat of grey, blending the ockre a bit back.
FINI
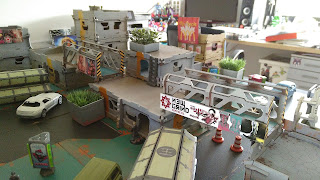
There you got your basic paint job. Later on, I taped off a stripe along the buildings hight to give it a color full stripe. This makes it easier to piece the buildings together, on the other hand it limits the possibility to combine the building pieces... but... meh. I like them how they are.A few posters late, I just need to paint the window shutters and the city is done.
I hope you found this usefull!
Till next time!


You can't argue with those results. Great looking scenery produced quickly. Great job.
ReplyDeleteThank you very much, I was searching for a fast "no airbrush" technique to paint building!
ReplyDelete